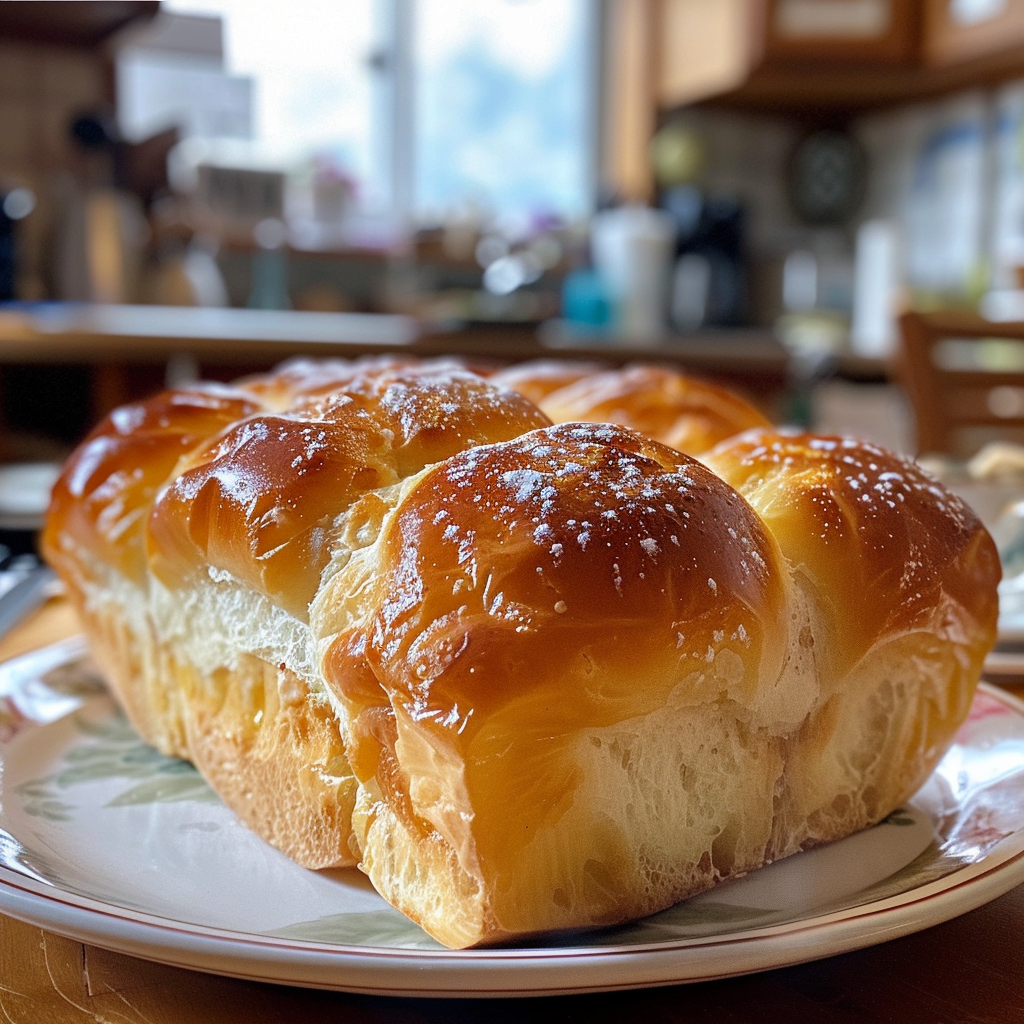
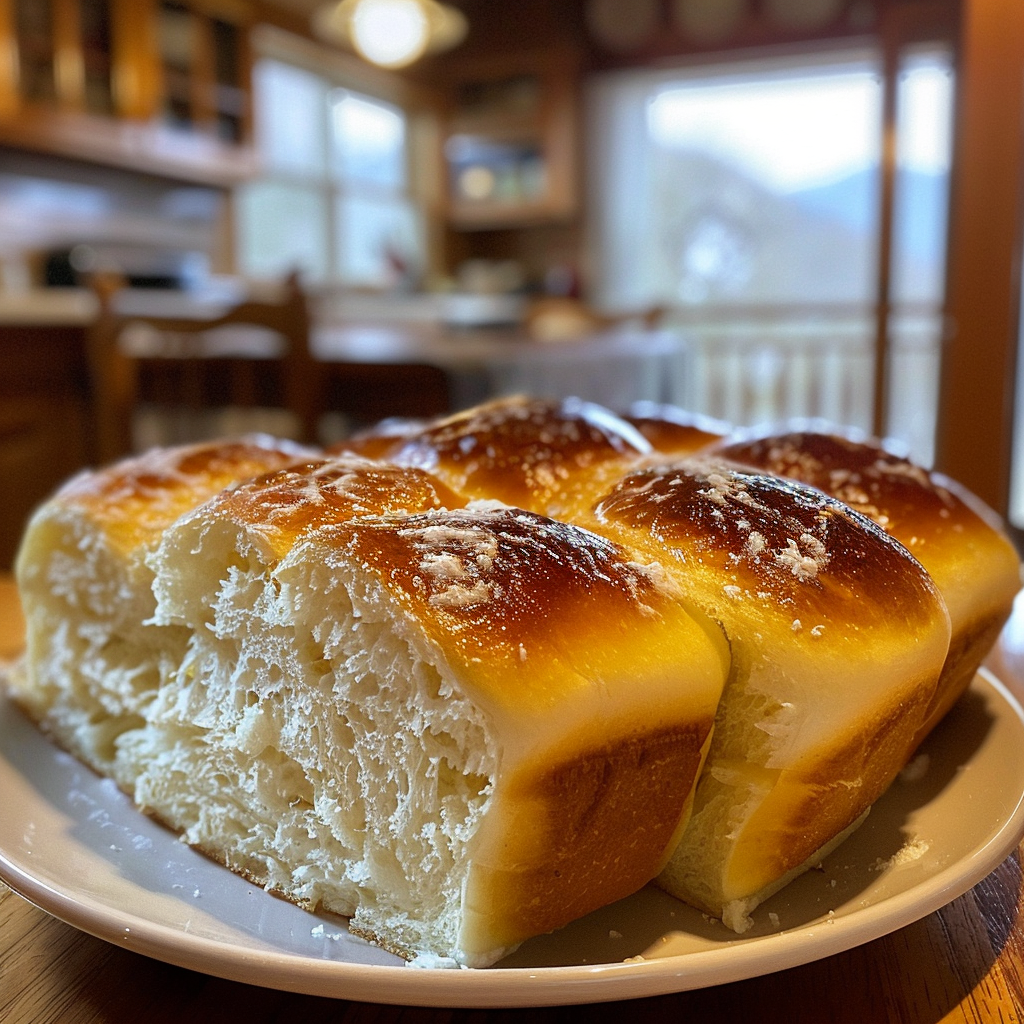
The aroma of freshly baked bread wafts through the air, wrapping you in a warm embrace as you take your first bite of heavenly Japanese milk bread. Its fluffy texture and slightly sweet flavor create a delightful experience that is simply irresistible. You might think, “How can something so simple be this perfect?” Well, my friend, that’s the magic of this recipe!
Jump to:
- <strong>Essential Ingredients</strong>
- <strong>Let’s Make it Together</strong>
- <strong>Perfecting the Cooking Process</strong>
- <strong>Add Your Touch</strong>
- <strong>Storing & Reheating</strong>
- <strong>FAQ</strong>
- What makes Japanese milk bread different from regular bread?
- Can I use whole wheat flour instead of all-purpose flour?
- How long does it take to bake Japanese milk bread?
- 📖 Recipe Card
Picture this: you’re gathered with loved ones, laughter fills the room, and there’s a loaf of warm milk bread on the table, waiting to be devoured. This heavenly Japanese milk bread recipe is not just a dish; it’s an invitation to create beautiful memories. Trust me when I say that every slice brings joy and happiness, making it the ideal addition to any occasion.
Why You'll Love This Recipe
- This heavenly Japanese milk bread is incredibly easy to prepare, ensuring success for both novice and seasoned bakers
- Its light and airy texture pairs perfectly with sweet or savory toppings, making it versatile for any meal
- The visual appeal of its soft golden crust will impress guests at brunch or dinner gatherings
- Plus, this recipe allows you to indulge in homemade goodness without any complicated techniques
I remember the first time I made this Japanese milk bread; my family couldn’t stop raving about how soft and delicious it was. It disappeared within minutes! For more inspiration, check out this delicious side dishes recipe.
Essential Ingredients
Here’s what you’ll need to make this delicious dish:
- All-Purpose Flour: A versatile flour that provides structure and tenderness to the bread; make sure it’s fresh for the best results.
- Milk: Whole milk adds richness and moisture; feel free to substitute with plant-based milk if preferred.
- Active Dry Yeast: Essential for leavening; ensure your yeast is active by checking the expiration date.
- Sugar: A bit of sweetness helps balance the flavors and aids yeast activation; granulated sugar works perfectly.
- Salt: A crucial ingredient that enhances flavor; don’t skip it or your bread will taste bland.
- Butter: Softened butter gives richness and flavor; using unsalted allows you better control over salt levels.
For the Topping:
- Egg Wash: A mixture of beaten egg and water enhances browning and gives a shiny finish; brush it on before baking.
The full ingredients list, including measurements, is provided in the recipe card directly below.
Let’s Make it Together
First things first: gather your ingredients and tools because we’re diving into bread-making bliss!
Activate Your Yeast: In a small bowl, combine warm milk (not hot) with sugar and yeast. Let it sit for about 5-10 minutes until foamy—this means it’s alive and ready to party!
Mix Dry Ingredients: In a large mixing bowl, combine flour and salt. Whisk them together like you’re trying to impress someone—get some air in there!
Add Wet Ingredients: Pour in your yeast mixture along with softened butter into the dry ingredients. Stir until combined; embrace your inner dough whisperer!
Knead Away!: Transfer your dough onto a floured surface. Knead for about 10 minutes until smooth—it should feel soft yet elastic under your hands.
First Rise Time!: Place the dough in a greased bowl, cover with a damp cloth, and let it rise in a warm spot for about an hour or until doubled in size—perfect time for a coffee break.
Punch Down & Shape Dough: Once risen, punch down gently (take out any frustrations), then shape into a loaf by folding edges inward. Place it in a greased loaf pan.
Second Rise Time!: Cover again with a cloth and let rise another 30-45 minutes until puffy—this is where your patience pays off!
Now comes the hard part: waiting while it bakes! Preheat your oven to 350°F (175°C). Brush the top with egg wash for that gorgeous golden crust.
Once baked for about 30-35 minutes or until golden brown, remove from oven and let cool on wire rack. And voilà! You’ve created heaven on earth!
Enjoy each slice toasted or slathered with butter or jam—you’ll be floating on cloud nine!
You Must Know
- This Heavenly Japanese Milk Bread Recipe is fluffy, soft, and perfect for sandwiches
- With a slightly sweet flavor and rich texture, it’s a delightful treat that pairs wonderfully with both sweet and savory toppings
- The aroma while baking is pure bliss, making your kitchen feel like a warm hug
Perfecting the Cooking Process
For more inspiration, check out this helpful cooking tips recipe.
Start by mixing your ingredients until smooth, then knead until elastic. Let it rise in a warm place until doubled. Shape the dough carefully before the final rise, ensuring it stays airy and fluffy.
Add Your Touch
Feel free to experiment! Add a touch of milk powder for extra richness or swap in honey for sugar. You can also incorporate matcha or cocoa powder for unique flavors.
Storing & Reheating
Store your milk bread in an airtight container at room temperature for up to three days. For longer storage, freeze slices individually and toast directly from frozen when desired.
Chef's Helpful Tips
- Always use room temperature ingredients to ensure better blending and rise
- Kneading well develops gluten, which gives bread its structure
- Avoid over-proofing; keep an eye on dough expansion for perfect texture
The first time I made this bread, my friends devoured it within minutes! Their compliments made me feel like a rockstar baker, even though all I did was follow a simple recipe.
FAQ
What makes Japanese milk bread different from regular bread?
Japanese milk bread has a softer texture thanks to the tangzhong method used in preparation.
Can I use whole wheat flour instead of all-purpose flour?
Yes, but the texture will vary; consider blending with all-purpose flour for best results.
How long does it take to bake Japanese milk bread?
Bake at 350°F (175°C) for about 30-35 minutes or until golden brown and hollow sounding.
Did You Enjoy Making This Recipe? Please rate this recipe with ⭐⭐⭐⭐⭐ or leave a comment.
📖 Recipe Card
PrintHeavenly Japanese Milk Bread
- Total Time: 55 minutes
- Yield: Approximately 12 servings 1x
Description
Indulge in the fluffy delight of Japanese milk bread, known for its soft texture and slightly sweet flavor. This versatile loaf is perfect for sandwiches, toast, or simply enjoyed with butter. Easy to make, it invites you to create warm memories with friends and family. Experience the magic of homemade goodness that fills your kitchen with an irresistible aroma!
Ingredients
- 4 cups all-purpose flour (480g)
- 1 cup whole milk (240ml)
- 2 tsp active dry yeast (7g)
- 2 tbsp granulated sugar (25g)
- 1 tsp salt (5g)
- 4 tbsp unsalted butter, softened (56g)
- 1 egg (for wash)
Instructions
- 1. Activate the yeast by combining warm milk, sugar, and yeast in a bowl. Let sit for 5-10 minutes until foamy.
- 2. In a large bowl, whisk together flour and salt.
- 3. Add the yeast mixture and softened butter to the dry ingredients; mix until combined.
- 4. Knead dough on a floured surface for about 10 minutes until smooth and elastic.
- 5. Place dough in a greased bowl, cover, and let rise in a warm area until doubled (about 1 hour).
- 6. Punch down the risen dough gently, shape into a loaf, and place in a greased loaf pan. Cover again and let rise until puffy (30-45 minutes).
- 7. Preheat oven to 350°F (175°C). Brush top with egg wash before baking for 30-35 minutes until golden brown. Cool on wire rack.
- Prep Time: 20 minutes
- Cook Time: 35 minutes
- Category: Baking
- Method: Baking
- Cuisine: Japanese
Nutrition
- Serving Size: 1 serving
- Calories: 179
- Sugar: 3g
- Sodium: 160mg
- Fat: 5g
- Saturated Fat: 3g
- Unsaturated Fat: 2g
- Trans Fat: 0g
- Carbohydrates: 29g
- Fiber: 1g
- Protein: 5g
- Cholesterol: 20mg